Lemon Bars

Woohoo!! Summertime is BACK…. & so is Your Vegan Neighbor!!! Whaaaaat?! That’s right!! HELLO, old friends & new friends!!! Ahhhhh…. it’s so good to be back!!

I sincerely apologize for my LOOOOONG hiatus!!!! All I can really say is, John Lennon was RIGHT! – “Life is what happens to you while you’re busy making other plans!” A lot has happened in my life these last few years since I posted last, but I won’t bore you with excuses in regards to Your Vegan Neighbor’s disappearance! I am still vegan, alive & kickin’! So…. Let’s not waste ANY more time – am I right?!!

These hot, sunshine filled days really make me crave cold, refreshing sweets… which brings me to these delicious summertime treats – LEMON BARS!!

These awesome little bars seem to be a favorite of many. This simple recipe is slightly adapted from one of my most beloved cookbooks, ‘The Joy of Vegan Baking,’ by Colleen Patrick-Goudreau. I highly recommend this book!

That’s a Little Plate of Heaven Right There! Yum!

For the Crust…

  • 1/2 cup butter, at room temperature (I prefer using Earth Balance sticks)
  • 1/4 cup confectioners sugar
  • 1 cup unbleached all-purpose flour

For the Filling…

  • a little more than 1/2 block of extra-firm silken tofu, which is roughly 3/4 cup (I use Mori-Nu’s shelf-stable boxes)
  • 1 cup granulated sugar
  • Zest of 2 lemons
  • 1/3 cup fresh lemon juice (please use fresh lemons for this! It will take 2-3)
  • 2 Tbsp unbleached flour
  • 1.5 Tbsp cornstarch
  • Sifted confectioners sugar, optional (this is to sift on top of the bars after they have cooled!)

Preheat your oven to 350*F. Grease & lightly flour an 8×8″ square baking pan, or simply line the pan with parchment paper (this is my preferred method, as you can lift the baked squares right out of the pan for cutting when they are done).

To make the crust, cream the butter & the sugar with an electric hand mixer until whipped and fluffy. Add the flour and mix until the dough comes together. Press into the bottom of your prepped pan and bake for around 20 minutes, until the edges start to brown lightly. Set on a wire rack to cool while you make your filling.

The Crust After Baking… Mmmmm….

To make the filling, in your food processor, blend the tofu until nice and creamy (about 1-2 minutes). Add the sugar & blend again until smooth. Add the lemon zest, lemon juice, flour & cornstarch and BLEND!! Pour the filling over the cooled shortbread crust… and get ready to witness the magic of baking!

Not the most exciting picture (my apologies), but… here’s the filling poured on top of the crust.

Bake for about 30 minutes, or until filling is set (I actually ended up cooking mine for 40 minutes & I think they turned out pretty perfect!) Remove from oven and allow to cool completely on a wire rack.

Chill in the fridge until ready to serve. If you used parchment, you should be able to lift it right out onto a cutting board before dividing into 9 even squares (or 16, depending on your preferences!). *Be sure to press your knife down hard to break through that delicious shortbread! Dust with confectioners sugar before serving for a lovely presentation.

Prepare yourself! These are addictive!

Makes 9 big squares, or 16 smaller bites – the level of gluttony you’d like to serve up is up to you! 😉

Butternut Squash & Black Bean Chili

Hey folks! It’s another Dinner and a Movie night! I don’t know about you, but this new year has been keeping me so busy! I’m definitely trying to make time for more blogging and especially for more ‘Dinner and a Movie’ nights! They are our favorites!

This week we watched Tim Burton’s ‘The Nightmare Before Christmas’ (one of our all-time favorites) and made “Jack Skellington’s Bone-Chilling Chili” (aka Black Bean and Butternut Squash Chili). READ ALL ABOUT OUR FUN MOVIE NIGHT HERE!!

If I have learned anything from having two kiddos, it’s that ANYTIME (esp. Dinner and a Movie night) is a good time to dress up!! So… “don’t be afraid”  to pull out the costumes & the Jack-o-lanterns for this spooky movie night! 😉

Vegan Broccoli and Cheese Soup

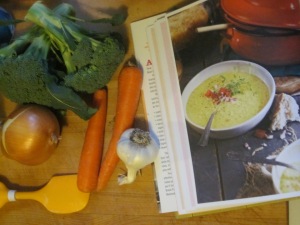
IMG_2185

Wow… 2014! I can barely believe it is the start of another new year. I have quite the list of resolutions this year… one is being more consistent on my blog… I know, I know… I’m off to a bit of a late start there, huh?! But for the last couple days, I have been putting some recipes from my newest cookbooks to the test, so I have lots of new favorites to share already. So here goes!

This is hands down one of the best vegan soups I have ever had! Creamy, filling and absolutely delicious. Oh… and did I mention healthy? This soup mimics traditional broccoli & cheese soup yet holds its own by remaking the classic recipe with a fabulous vegan twist. The recipe is from Isa Chandra Moskowitz’s newest book ‘Isa Does It’.  We devoured the entire pot (except for one bowl, which I happily took to work for my lunch the next day) – & even my 3-year-old son was a fan! And the best part? It is completely and amazingly 100% healthy. No dairy, no soy, no faux cheeses of any kind… If you would’ve told me I would be eating “cheddary broccoli soup” that contained no cheese at all, I would’ve never believed it could be this good… and neither will you. Thank god Isa was born!

The secret of the creaminess lies within the cashew cream. This cashew cream is amazing stuff. I hope you aren’t allergic to cashews, because the cashew cream train is swiftly chugging along… and I’m hopping aboard! Sorry, I know I can sometimes be a little “cheesy” 😉 I didn’t have any cashews pre-soaked, so I boiled them for 15 minutes and then let them sit for as long as possible, as recommended in the book – worked like a charm.

Oh – two more things – 1) You will need an immersion blender for this recipe, and 2) This AWESOME soup is not only dairy free, but gluten-free as well 🙂 Bring it on!

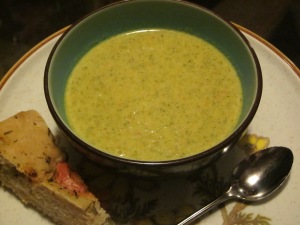
IMG_2191

Oooooh yeeeeeah. Serve with some homemade bread on the side for complete satisfaction.

Cheddary Broccoli Soup

Ingredients for the Soup:

  • 1 Tbsp Olive Oil
  • 1 small yellow onion, diced
  • 1/2 tsp salt, plus a pinch
  • 3 cloves garlic, minced
  • 4 cups chopped broccoli – stems and florets
  • 1/2 cup peeled and chopped carrots
  • 1/2 tsp ground turmeric
  • 3 cups vegetable broth

Ingredients for the cashew cream:

  • 1 cup cashews, soaked for at least 2 hours, or overnight (*or the quick boil method I mentioned above)
  • 2 cups vegetable broth
  • 3 Tbsp mellow white miso
  • 2 Tbsp nutritional yeast flakes
  • 2 Tbsp fresh lemon juice
  • freshly ground black pepper

Preparing the Soup:

Preheat a soup pot over medium heat and add the oil. Sauté the onion in the oil with a pinch of salt – just until softened, about 3 min. Add the garlic and sauté for 30 seconds or so, until fragrant.

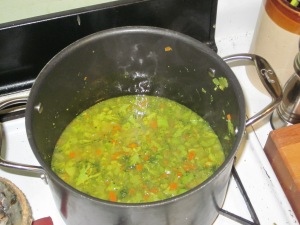
Add the broccoli, carrots, turmeric, remaining 1/2 tsp salt and broth. Cover and bring to a boil. Once boiling, lower heat to a simmer. Cook about 10 minutes until the carrots are very tender.

IMG_2187

Can this soup REALLY be this easy?

Prepare the Cashew Cream:

In the meantime, make the cashew cream by draining the cashews and placing them in a blender/food processor with the broth, miso and nutritional yeast. Blend like crazy, until smooth. This can take anywhere from 1-5 minutes. Scrape the sides of your blender down with a rubber spatula every now and then. (Mine was full to the brim! Unless you have a giant food processor, don’t be alarmed if a little liquid leaks out. I just wrapped a towel around the base of my mixer bowl to catch any overflow.). And voila! Cashew Cream!

When the carrots are tender, add the cashew cream to the soup. Use an immersion blender to puree so that only tiny bits of broccoli and carrot are visible. Keep the soup on low heat, partially covered for about 10 minutes, until thickened, stirring occasionally.

Once thickened, add the lemon juice and pepper, taste for seasoning, and serve. It thickens a bit more as it cools, so you’ll probably need to thin out the leftovers, if there are any!

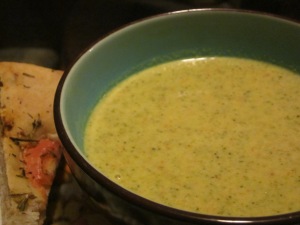
IMG_2192

And there you have it, folks… heaven in a bowl.

On another note, I would like to say, only my latest posts are listed on the sidebar – Don’t forget to try my search bar if you are looking for something in particular! I’ve been writing this blog since 2011 so there’s some delicious history back up in there!

Tofu Scramble

IMG_2073

Life is a lot like tofu… it is what you make it!!!

Mmmm I just love tofu. I love it fried, baked, sautéed… in sandwiches, as spreads, as a side or as a main course. When it comes to cooking tofu, there are literally so many ways to cook it since it basically takes on the flavor of whatever you mix it with, the possibilities are endless. It is an incredible source of protein & is incredibly easy to use in the kitchen. (Plus, no need to worry about salmonella!)

Most of the time, when people say they don’t like tofu, I find it is basically because they had no idea what to do with it or how to cook it and they ended up with something… wierd. Here’s my advice: Start simple. Try a few recipes and you will come to love this versatile protein! A few of my favorites using “regular tofu”  are sesame sweet tofu, golden tofu, & v’egg salad. (When I say regular tofu I just mean not silken tofu -you can find “regular tofu” in the refrigerated part of the healthy foods section of your grocery store –  I almost always use extra -firm or firm tofu unless a recipe calls otherwise.)

Now… onto breakfast & scrambles! My kids & I really love Fantastic Foods Tofu Scramble mix. They will eat it for any meal, any day of the week. It is a great addition to any pantry for a super quick breakfast that requires no thinking. However, I love to occasionally cook my own tofu scramble, but as you will find, flavor can vary greatly depending, which is hit or miss if you have kids. Unfortunately, my kids aren’t much like “Mikey”. (You remember -” Mikey will eat anything!” Sorry Life Cereal, but that’s not really a good marketing slogan! Its like Checker’s “You gotta eat”… you know, since you have to eat something, eat this! lol!)

The fun thing about making a homemade tofu scramble, is that you can go Indian (curry), southwestern (add salsa, hot sauce, peppers), Italian (add pesto and olives)… its all up to your mood! What mood are you in?

Usually when I make a scramble I just add some of this and some of that until it turns out just the way I want it. I don’t really have a recipe with measurements figured out. This morning, I wanted that to change, so we decided to have ourselves a little homemade tofu scramble taste test – I basically wanted to try two different scramble bases, to find one the kids liked best so that we could build on and add veggies to…  Today we used a curry-based recipe from the book ‘Vegan Brunch’ by Isa Chandra Moskowitz. The other was a quick one I threw together (with similar flavors in our favorite fried tofu) using sesame oil, soy sauce & nutritional yeast.

I started out by sauting some onion and garlic in some olive oil. Then I added the tofu, crumbled into big chunks. Once it browned a little, I split the mixture into two pans and  seasoned them separately.

IMG_2069

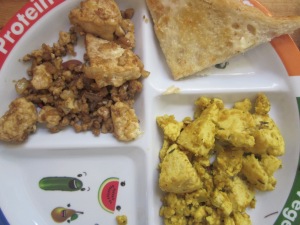
This is only ONE block of tofu, divided equally, the top is the curry blend.

Results: My son LOVED the curry based tofu, which was a total surprise! I thought maybe it would be too heavily flavored for the kids. I actually preferred the sesame/soy one. My daughter was a little pickier about her tofu this morning… she tends to prefer my “old fashioned” scramble – this is when I just go for broke into my spice cabinet, adding dry herbs (dashes of basil, oregano, thyme), heavy on the dry mustard, dashes of soy sauce, nutritional yeast (and that onion/garlic mixture – shhh! don’t tell her!)… see what I mean about no measurements? 😉 Anyway, Id love to hear which one YOU like the best!

The recipes below are for a full portion (using 1 full block of tofu each).

Basic Scramble #1, Curry-Style, compliments of ‘Vegan Brunch’

F0r the spice blend:

  • 2 tps ground cumin
  • 1 tsp dried thyme, crushed with your fingers
  • 1/2 tsp ground turmeric
  • 1 tsp salt
  • 3 Tablespoons water

For the tofu:

  • 3 garlic cloves, minced
  • 2 Tbsp olive oil
  • 1 lb tofu, extra firm, drained
  • 1/4 cup nutritional yeast

1) Mix the spices together in a small cup. Add the water. Set aside.

2) Preheat a large pan, sauté the garlic in olive oil for about a minute. Break the tofu apart into bite sized pieces and sauté about 10 minutes, until it starts to brown. (Keep it moist by adding a splash of water occasionally if necessary.)

3) Add the spice blend mix and incorporate. Add the nutritional yeast and cook about 5 more min. Serve warm.  (Feel free to add other veggies or make alterations – there are a bunch of great variations/add-ins in the book!)

Basic Scramble #2 – Super Simple Sesame & Soy Sauce

You will need:

  • 2 Tbsp soysauce
  • 1 Tbsp toasted sesame oil
  • 1 block tofu, extra firm, drained
  • nutritional yeast (a couple tablespoons)
  • salt and pepper to taste
  • 1 small-medium onion, chopped to your liking (minced or crescents)
  • 3-4 cloves of minced garlic

1) Saute a small/medium onion (I like mine minced so my kids wont know they are eating it!) and 3-4 cloves of garlic (minced) in a little olive oil. Cook about 5 minutes until onion turns translucent. Set aside.

2) Heat 1 Tbsp or so toasted sesame oil in a pan over medium heat until hot. Add the tofu and cook until tofu starts to brown lightly.

3) Add 2 Tbsp soy sauce and mix gently, trying not to turn all your chunks into crumbles. Sprinkle generously with nutritional yeast, sauté about 5 more minutes before serving.  You can drizzle a little more sesame oil over the top if you so desire.

Again, feel free to add veggies or anything you’d like! Toasted sesame seeds, some leafy greens like kale, even some minced ginger. Get creative and then… DEVOUR!!  

IMG_2072

Looks like we needed TWO protein sections this morning! 🙂

Twas the Night Before Thanksgiving

“WHAAAAAAAT?!” I cant help but laugh every time i think about Ralphie’s friends mother, from the Christmas Story, in that scene on the phone, where Ralphie’s mom called the mother of his friend – the one who had supposedly taught Ralphie the dreaded “f” word.  Well, that’s exactly how I feel whenever I think about Thanksgiving being tomorrow and Christmas fast closing in! WHAAAAAAT?!?!?!

Man, I have been so busy recuperating from being sick the last 2 weeks and taking care of my kids (who were also sick) & working that I haven’t really had time to do much else.  We all caught an awful respiratory/sinus infection. Oh I wouldn’t wish it on anyone. It took days to get better!! I had to skip work for 3 days, which is a big deal this time of year in retail! Now I remember why I had the rule to always eat a raw clove of garlic every day! It works! Do it!

I have been looking forward to this Thanksgiving since last Thanksgiving. I just love watching my family devour delicious vegan food. My super-mom takes on the task of making food for all 20 of us – the majority of which are vegan and gluten-free (the dishes, not the folks)- which is no easy feat. Thanks momma!

When we gather as a large group, we have all kinds of eaters, including those of meat. SO, yes, I usually do have to sit at the table with a turkey, or sometimes 2 😦  I would love it to not have a turkey at the table, but I feel that Thanksgiving isn’t about judging each other or giving each other a hard time, nor is it the time to “lecture” one about eating meat, which only turns those people I am trying to reach farther away. The secret is this: I find that if you bring delicious vegan food to the table, it will impress even the most devout meat eaters and bring the vegan way to light in a positive way rather than a negative one. No one likes a preachy vegan and I try my damndest to not be one, no matter how passionate I am (and believe me, I am VERY passionate about veganism!).

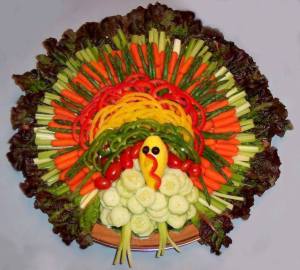
In my opinion, with a table full of delicious sides to choose from, a centerpiece dish (such as a turkey or tofurkey) is not even necessary!   Vegetable dishes are probably the easiest things to make vegan. I’ll take a great veggie plate ANY day!! And there are so many different ways to cook vegetables! You can readily replace butter with soy margarine, milk with soymilk, etc.in most recipes. You can find many traditional dishes that are vegan “on accident!”

I also find that if you just serve food without making a huge fuss about it being vegan, more people try it. In fact, sometimes I think it is best if you don’t say anything about it being vegan. Then, after your guests are complimenting the terrific food, saying it is absolutely the best whatever-it-was that they ever had, THAT is the time to say “Yeah, it IS awesome huh?! And guess what… its 100% VEGAN!” I have literally seen eyes pop out of heads with that method.

Despite being sick, I had some terrifically awesome news this week. I was invited to show my art at a popular restaurant that is opening a new location on Friday… Viva Argentina. I am so excited because I have been wanting to display my art for several years, and just haven’t found the time. Well, somehow, in the last 3 days, I have found time to make this happen! Needless to say, I have been running around like a Tasmanian devil ever since I was propositioned… working, framing, matting, and figuring things out! My blog kinda got put on the back-burner for the last 3 weeks due to these factors, which is a SHAME since Thanksgiving is the day after tomorrow.  So, the least I could do was to share a few amazing links with you all!

This one is Buzzfeeds 2013 Thanksgiving recipe compilation. It is full of great stuff!  Also, Buzzfeeds 2012 list  has even more great selections!!  Don’t forget to scroll through my vegetable & holiday dishes! I make a mean pumpkin pie (without even using tofu!), and my cauliflower-mashed potatoes, butternut squash  soup and agave glazed carrots are also good choices for holiday dining!

No matter what you are faced with this Thanksgiving, try to do one thing: remember to be grateful for the family you have, regardless of their food choices. If there is one thing I have learned, it is that being respectful (even if you don’t agree) brings people together and  makes more open minds than closed ones. Some people are very defense about their right to eat meat. Some people will have a million and one reasons to argue with you. Don’t do it!! The best way to win an argument about veganism is to simply bring it to the table – the food, not the debate! In fact, I just found this awesome article about just that & other concerns you may have on the Vegetarian Institutes Site.

Now go rest up and have yourself a holiday chocolate peppermint martini!!  Christmas is only 28 days away!!  Happy Thanksgiving!

1460134_743533962328552_1246165763_n

Lemon Poppyseed Muffins

As long as I can remember, I have enjoyed creating food. Before I was old enough to be in the kitchen alone, I was outside letting my mud cookies “bake” on a wooden board out in the sun. When I realized that I could tie my passion for animals and baking together, my heart almost exploded.  I truly love it when someone is wowed by something i made, or surprised that vegan food “can actually be good”! (Geez, its mind-blowing and sad to me how disconnected some of us are from eating real homemade foods with no preservatives!) I love showing people that you don’t need to use dairy/eggs in baking. I love teaching others what I like to call “compassionate cooking”!

IMG_1946

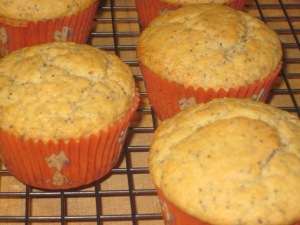
Okay, I know… I really need better pictures of these – You’ll have to forgive me. I was in a rush – to eat them. I will take better pictures next time, which will be soon! Hey, I never claimed to be a photographer, I’m just your vegan neighbor who likes to make yummy food!

This recipe is more or less straight from Isa Chandra Moskowitz’s book “Vegan Brunch”, which may be my favorite of her’s.  I actually own all her books except the pie one, which will be on my Xmas wish list! Chef Isa might slap me if she knew I used lemon juice from a jar instead of fresh lemon juice, but sometimes when you get a craving, you Tim Gunn it… and by that, i mean, you “MAKE IT WORK”. So, Isa’s original recipe contains fresh lemon juice and also 2 Tbsp lemon zest. Next time I’ll make Isa proud, but this time, it was still good enough to where my daughter said “Can i have another cupcake?” when it was gone! Now that’s a good muffin!

I actually had the pleasure (or should I say honor) of meeting Isa Chandra Moskowitz today! She came and had a reading from her new book ‘Isa Does It’ at our local bookstore Avid Books in Athens GA. (BTW, the book is filled with really simple amazing recipes I cant wait to try! Very pantry-friendly recipes & full color pictures! I highly recommend you go buy it!) This past weekend was VegFest in Atlanta, which unfortunately I was unable to attend, though I was happy to be able to be a part of Isa’s visit to Athens. She was very down to earth – and totally funny! Ahhh… just another reason to love her!! I also got to meet & briefly chat with another one of my favorite bloggers, “Vegan Dad”, who was in town for VegFest and was there for Isa’s appearance as well! 🙂

IMG_1989

Me & Isa – Too bad the guy in line behind me was a terrible photographer! It’s a little fuzzy and the light is terrible, but I’m just glad I got a picture! I didn’t want to take up anymore of her time asking for a re-do!

Lemon Poppy Seed Muffins

  • 2 cups all-purpose flour
  • 2/3 cup sugar
  • 1 Tbsp baking powder
  • 5 tsp poppy seeds
  • 1/8 tsp salt
  • 3/4 cup non-dairy milk (I used almond)
  • 1/4 cup fresh lemon juice
  • 1/2 cup canola oil
  • 2 Tbsp lemon zest
  • 2 tsp pure vanilla extract

1) Preheat oven to 375. Lightly grease a muffin tin or line with paper cups.

2) In a large bowl, mix flour, sugar, baking powder, poppy seeds and salt.

3) Mix liquids in a small bowl separately. Make a well in the center and add the liquids. Mix gently until dry ingredients are moistened and no pockets of flour remain. It will look a little lumpy.

4) Fill muffin tins evenly and bake 23-27 minutes, until tops are lightly browned and a toothpick comes out clean. When cool enough to handle, move out of the tin onto a cooling rack. Devour!

*Please note: I am working on taking better pictures of my food. I think day light is key to a good picture with my particular camera & I made these at night and I just couldn’t get a good shot. I know how important the pictures are to all you “foodies” out there, so just bear with me! 🙂

No-Rise Cinnamon Rolls

IMG_1897

There is not much like homemade cinnamon rolls. If you have the time, I strongly urge you to make the real deal yeast-risen kind… You can even prepare the dough at night and put it in the fridge to rise overnight, which bakes up beautiful & fresh in the morning… But… if you wake up on the weekend craving cinnamon rolls and you didn’t prepare the night before, well, dang. Sometimes you just have to figure something out!! Which is where these come in.

So, I was kinda wingin’ it with these and they turned out really good!  You can make them with any kind of milk… almond, soy or even coconut milk from a can… and  you can choose between soy margarine or coconut oil for your fat. I have done them both ways and I recommend using coconut milk (for moistness) and soy margarine (for the flakiest pull-apart sections)! The taste was good when using the coconut oil but it didn’t make the sections flaky like when I used the soy butter. The oil made them almost muffin-y, which isn’t the cinnamon roll I was looking for.

No Rise Cinnamon Rolls

Ingredients:

  • 3 1/2 cups flour (basically any kind will do! I strongly suggest using at least half unbleached white flour so they aren’t too “healthy tasting” – C’mon, you’re making cinnamon rolls! Splurge! I used 3 cups unbleached flour + 1/2 cup whole wheat pastry flour)
  • 1 tsp salt
  • 1 Tbsp baking powder
  • 2 tsp baking soda
  • 6 Tbsp soy margarine
  • 1 cup almond OR soy milk OR unsweetened coconut milk (canned)
  • 1 tsp vanilla
  • 1/3 cup fresh orange juice (tip: Valencia’s are juicy!)
  • 2 tsp melted butter (for brushing on dough before sprinkling filling)
  • 3/4 cup brown sugar (for the filling)
  • 1-2 Tbsp cinnamon (for the filling)
  • frosting ingredients (see below)

1) Mix dry ingredients and cut in the margarine with a fork or with your fingers until well broken up. Pea sized bits are good. Little bits & pieces make for a yummy flaky dough!

2) In a separate bowl, mix your milk of choice, vanilla & oj.

3) Make a well in the center of the flour mixture and pour the liquids in.

4) Fold the dough gently with a rubber spatula until it is well combined. Try to mix as little as necessary to avoid having tough dough. The dough should be thick but soft. (If the dough seems a little too dry and isn’t coming together, add a teeny splash more of milk. If it’s too sticky, add a tiny sprinkle more of flour. Do this if only absolutely necessary.)

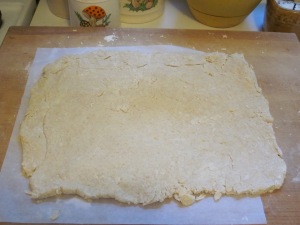
5) Gather the dough into a ball and roll it out into a large rectangle on a lightly floured surface. It really helps to roll it out on some lightly floured parchment if you have any. That way when you are rolling it into a tube, it doesn’t get stuck on the counter as easily. Roll it out to between 1/4″ – 1/2″ thick.

IMG_1872

Roll out the dough into a thick large rectangle…

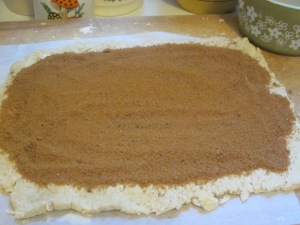
6) Brush the dough with the melted butter and sprinkle the cinnamon and sugar. Leave the very edge uncovered, so when you roll it up and pinch it together, it sticks easier.

IMG_1873

Spread the sugar evenly!

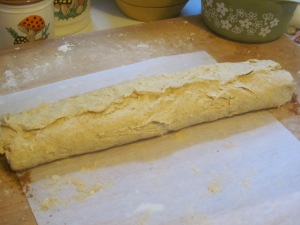
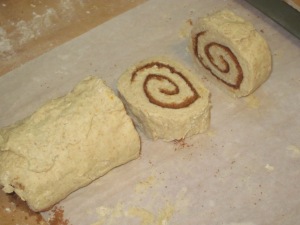
7) Roll up carefully & pinch the seam together. Cut the tube into slices (A serrated knife or criss-crossing dental floss to cut the rounds is an easy technique!) Cut them into nice thick rounds… 1  1/2″ wide is good! Im gonna make it a point to shoot for 10 from now on.

IMG_1874

Roll it up!

IMG_1875

Slice it up into thick 1  1/2″ rounds! These rounds aren’t thick enough! Next time I’m making 10 instead of 12.

8) Space out evenly in a rectangular baking pan or squeeze them into a 9″ round dish. Bake at 450 for 12-14 min OR at 375 for 30 min. Always check them at minimum cooking time.

You want to give them a little room to spread out… but the secret to really awesome moist sticky cinnamon rolls is having them close enough to spread/bake squished together…

(Tip: On my first attempt, I gave them too much room. I only put 7 in the pan. I guess I was thinking that way they could get really big, which they did, but the sides were too tough/overcooked from being separated – what I learned is that when they spread together and cook while touching, it makes them way more moist & smushy! So go ahead – jam them all in one pan together!

9) Let them cool for several minutes before frosting them with icing of choice. I suggest Frosting #2.

FROSTING / ICING

Frosting #1 / Glaze

  • 1/2 cup powdered sugar + 2 Tbsp
  • 2 Tbsp soymilk
  • 1 tsp vanilla

Frosting #2 / Icing

So, I was making the glaze, but then I paused because I remembered… When I was a kid, we used to get those Pillsbury Cinnamon Rolls that you busted open the tube and they were ready to go with the icing on the side – that thick icing that you had to spread over the fresh-baked rolls with a knife… And I thought, this glaze isn’t going to recreate my memory of those cinnamon rolls. It was just too thin. So I added a few things until it thickened up and tasted just right… So I made the glaze above and added:

  • >1/3  tub of 8 oz container cream cheese (I like Tofutti)
  • a splash of fresh squeezed oj
  • 1 tsp vanilla
  • a little orange zest (optional)

Blend or whip thoroughly until creamy. Chill until ready to serve. You can thank me later 😉

IMG_1890

These tasted great but there needed to be more rolls in the pan to keep the sides from being over-cooked. Ooooh! They are soooo goood! I strongly recommend making 10 rolls and squishing them all up in there for No-Rise Perfection!

IMG_1896

Banana Coconut Spelt Muffins

IMG_1929

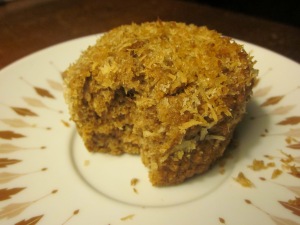
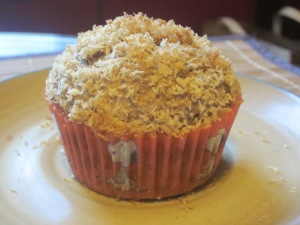
Wow! These muffins are amazing! I love making muffins because they are a great breakfast, snack and healthy addition to my daughters sack lunches.  I made this recipe gluten-free* and soy-free. I really love using coconut oil instead of canola when I can. In my experience, it makes for a moister bread. Also, the benefits of coconut are awesome!  Next time I think Im going to try to make them into jumbo muffins 🙂

* Spelt flour is a good substitute for people with a low intolerance for wheat, though people with serious wheat allergies, such as those with celiac disease, are also allergic to spelt, as it is not 100% wheat-free. If necessary, you can replace the spelt flour with a 100% gluten free baking mix (most grocery stores carry a blend for general flour replacing).

I have a bit of an addiction of downloading free cookbooks onto my kindle… And it doesn’t have to be a vegan cookbook either – veganizing recipes is fun and usually pretty easy! Yes, you could say I’m  bit of a sucker for a bargain – a trait I definitely acquired from my Dad! It’s a blessing and a curse… I truly love scouring through thrift stores to seek out unique treasures to bring home! (My home is filled with such things!) And yet I am simultaneously trying to declutter! It doesn’t help matters much that I’m also a major recycler… I try to recycle everything. Like sometimes instead of throwing something out, I will try to repurpose it… this may explain the boxes and piles I have stashed away that I often pretend are invisible! Overall, I see my recycling efforts as positive. A lot of good things have come from my repurposing! 🙂

The base of this recipe came from one of the free kindle books I got called ‘Smart School Time Recipes’. The original recipe was from ‘Andrea at Bakerymanis.wordpress’, to give credit where it is due, though I did end up altering it quite a bit.

IMG_1919

I found these adorable Snoopy cupcake liners at Michaels Craft Store!

Banana Coconut Spelt Muffins

  • 2 cups whole spelt flour
  • 1  tsp baking soda
  • 1 tsp ground cinnamon
  • 1/2 tsp ground nutmeg
  • 1/4 tsp sea salt
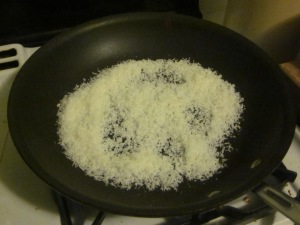
  • 1/2 cup toasted coconut flakes (I used shredded coconut and browned it in a skillet – watch carefully, it browns quickly!)
  • 1 cup mashed banana (this was about 1  1/2 bananas)
  • 1/2 cup coconut oil
  • 1/2 cup sucanat or brown sugar (I used light brown sugar)
  • 1/4 cup soy milk +  1 tsp cider vinegar (I used almond milk)
  • Topping: 1/3 coconut flakes + 2 tbsp. turbinado sugar (I subbed brown sugar  because I just happened to be out of turbinado! It turned out awesome!)

1) Preheat oven to 350. Grease 12 muffin cups or line with baking cups.

2) Mix dry ingredients (flour, baking soda, cinnamon, nutmeg, salt & toasted coconut) and set aside.

IMG_1913

Toasting the coconut is easy!

3) Peel the bananas and mash gently into measuring cup to make 1 cup. Blend in a food processor along with the oil, sugar, non-dairy milk + vinegar. Blend until smooth.

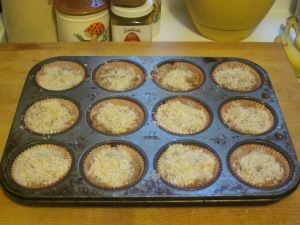
4) Add wet to dry and mix. (The great thing about baking with spelt is you don’t have to worry about over-mixing as you do with gluten-filled flours!) Fill muffin tins equally with batter and distribute topping evenly among the 12 muffins.

IMG_1914

Before baking…

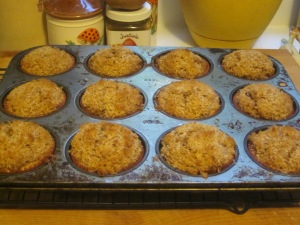
5) Bake 23-25 minutes until they start to turn golden brown on top. Let cool for several minutes… then DEVOUR!!!

IMG_1916

Yum! Yum!

IMG_1920

I love me some muffins!

IMG_1919

Vegan Chick’n & Waffles

Finally! Dinner & A Movie night is back! I hope you enjoy this Dinner and a Movie, featuring the ever so popular ‘Shrek’ quadrilogy! Feel free to watch ANY of the Shrek movies with this meal. We watched all four of them over a couple days and ended up eating this meal with the final movie  Shrek –  Forever After.

Read all about our movie night by clicking here! As always, feel free to comment and send me suggestions or ideas! Thanks! Hope you enjoy!

Crock-Pot Vegan Chicken & Mushroom Casserole

(This is a crock pot recipe, but it only cooks for 1 – 1  1/2 hours & is best if you can occasionally give it a stir.  It can even be started the night before and assembled before cooking. Start cooking this 1  1/2 hours before serving time.)

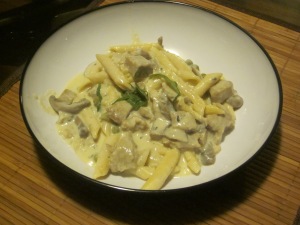
IMG_1827

Fall calls for the start of comfort foods. I can’t get enough thick soups and casseroles this time of year! I remember loving my mom’s chicken noodle casserole when I was a kid. Though this is not based on her actual recipe, it is kind of like my veganized version from my childhood memory. I have been trying more crock pot recipes out lately & intend to try more, especially the long-cooking ones… It’s amazing to come home from work and smell dinner cooking. Its like having your very own private chef! This would be an easy dish to take to a fall pot luck!

I was so pleased that my 3 & 5-year old kids liked this. In fact, I didn’t tell my daughter she was eating seitan (she thought it was “tofu chicken”, which she loves) until she was into her second serving and asking for more of the “tofu”. She was even giving me seriously exaggerated “MMM”‘s! every time she had a piece (she was loving it so much she was rolling her eyes with every bite!).  When I told her she was eating seitan -& loving it – her eyes practically popped out of her head! LOL… We have had numerous failed attempts at finding ways to get the kids to eat seitan, it’s just not one of their favorites. SO, I was stoked it was a hit! Hurray for another delicious & healthy recipe that they enjoy! 🙂  I hope you enjoy this as much as we did! This could easily be baked in the oven in a casserole dish though I until I try it myself, I cannot vouch for oven temp/cooking times as of yet.

IMG_1824

Vegan Chicken & Mushroom Casserole B.B.C (Before Bread Crumbs)

Crock-Pot Vegan Chicken & Mushroom Casserole

Ingredients:

  • 2 Tbsp olive oil
  • 1 small onion, minced
  • 2 cloves garlic, minced
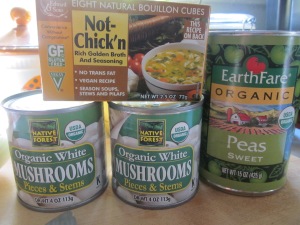
  • 10 oz sliced mushrooms ( I used 2 cans, which rang in at about 8 oz)
  • 1 Tbsp vegan chicken-flavored bouillon (I used one square of Edward & Sons Not-Chicken Bouillon Cubes by dissolving it in a bit of the milk, heated)
  • 4 cups plain unsweetened non-dairy milk
  • 1 1/2 -2 cups seitan, plain or chicken-flavored, torn or chopped into small cubes. Use store-bought or homemade seitan. (I actually used plain seitan and it was great… One box was about 1.5 cups &I had about a 1/2 cup already in my fridge that I threw in to use it up.)
  • 8 oz dried pasta shells of choice (whole wheat or regular – I used some penne noodles but most anything would work.)
  • 3/4 cup peas (opt. – I just love peas, so I added some in there!)
  • 1/2 tsp thyme dried
  • salt and pepper to taste (the veg bouillon cube is so high in sodium I didn’t add any additional salt)
  • 2 Tbsp flour, if needed to thicken
  • Bread crumbs or topping of choice (think panko, crushed Ritz, crushed potato chips, French fried onions…)

IMG_1816

A few of my ingredients.. though you could also use fresh mushrooms and peas if you choose.

1) To make the cashew cream sauce, blend in a food processor until smooth & creamy:

  • 1/2 cup raw unsalted cashews
  • 1/2 cup water
  • 2 tsp lemon juice

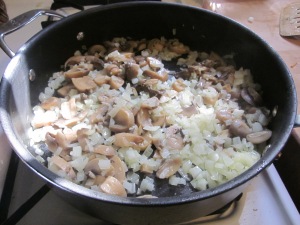
2) Heat the oil in a skillet over medium heat and sauté the onion until translucent, about 3-5 min. Add the garlic and mushrooms and sauté until the mushrooms reduce in size and are tender, 5-10 min. (If you use canned mushrooms, just cook 5-10 min as well to blend flavors.)

IMG_1822

At this point you can refrigerate both the sauce and the veggies, separately, until the next day if you are preparing this ahead.

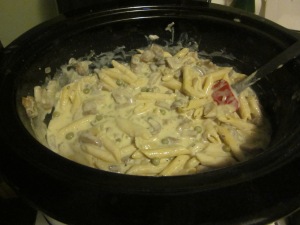
3) Oil the crock of your slow cooker and combine the sautéed veggies, cashew cream sauce, disintegrated bouillon cube, milk, seitan, pasta, thyme & pepper in the slow cooker. Mix thoroughly and cook on high for 1 – 1 1/2 hours, or until the pasta is al dente. Give it a good stir about every 20 minutes or so.

IMG_1823

Ready to seal her up for an hour and a half to cook and thicken up!

4) If the pasta is ready but the sauce isn’t thick enough, stir in the flour. This should help thicken it up. (Note: I added in the flour to find that after I had taken the lid off the crock pot, it thickened up more on its own very quickly!) If desired, add your topping before serving. Devour!!

IMG_1825

D’oh! I forgot my bread crumbs!!! (I did add some a moment later once I was eating and realized they had been forgotten!! I put a little fresh basil on mine.)

This was truly delicious & easy. Will make again for sure. Id love to try baking it in the oven sometime with some French Fried Onions on top.  Let me know if you try that! And as always, suggestions and comments are appreciated!